Linux Partitioning/Swap Guide
PARTİTİONİNG
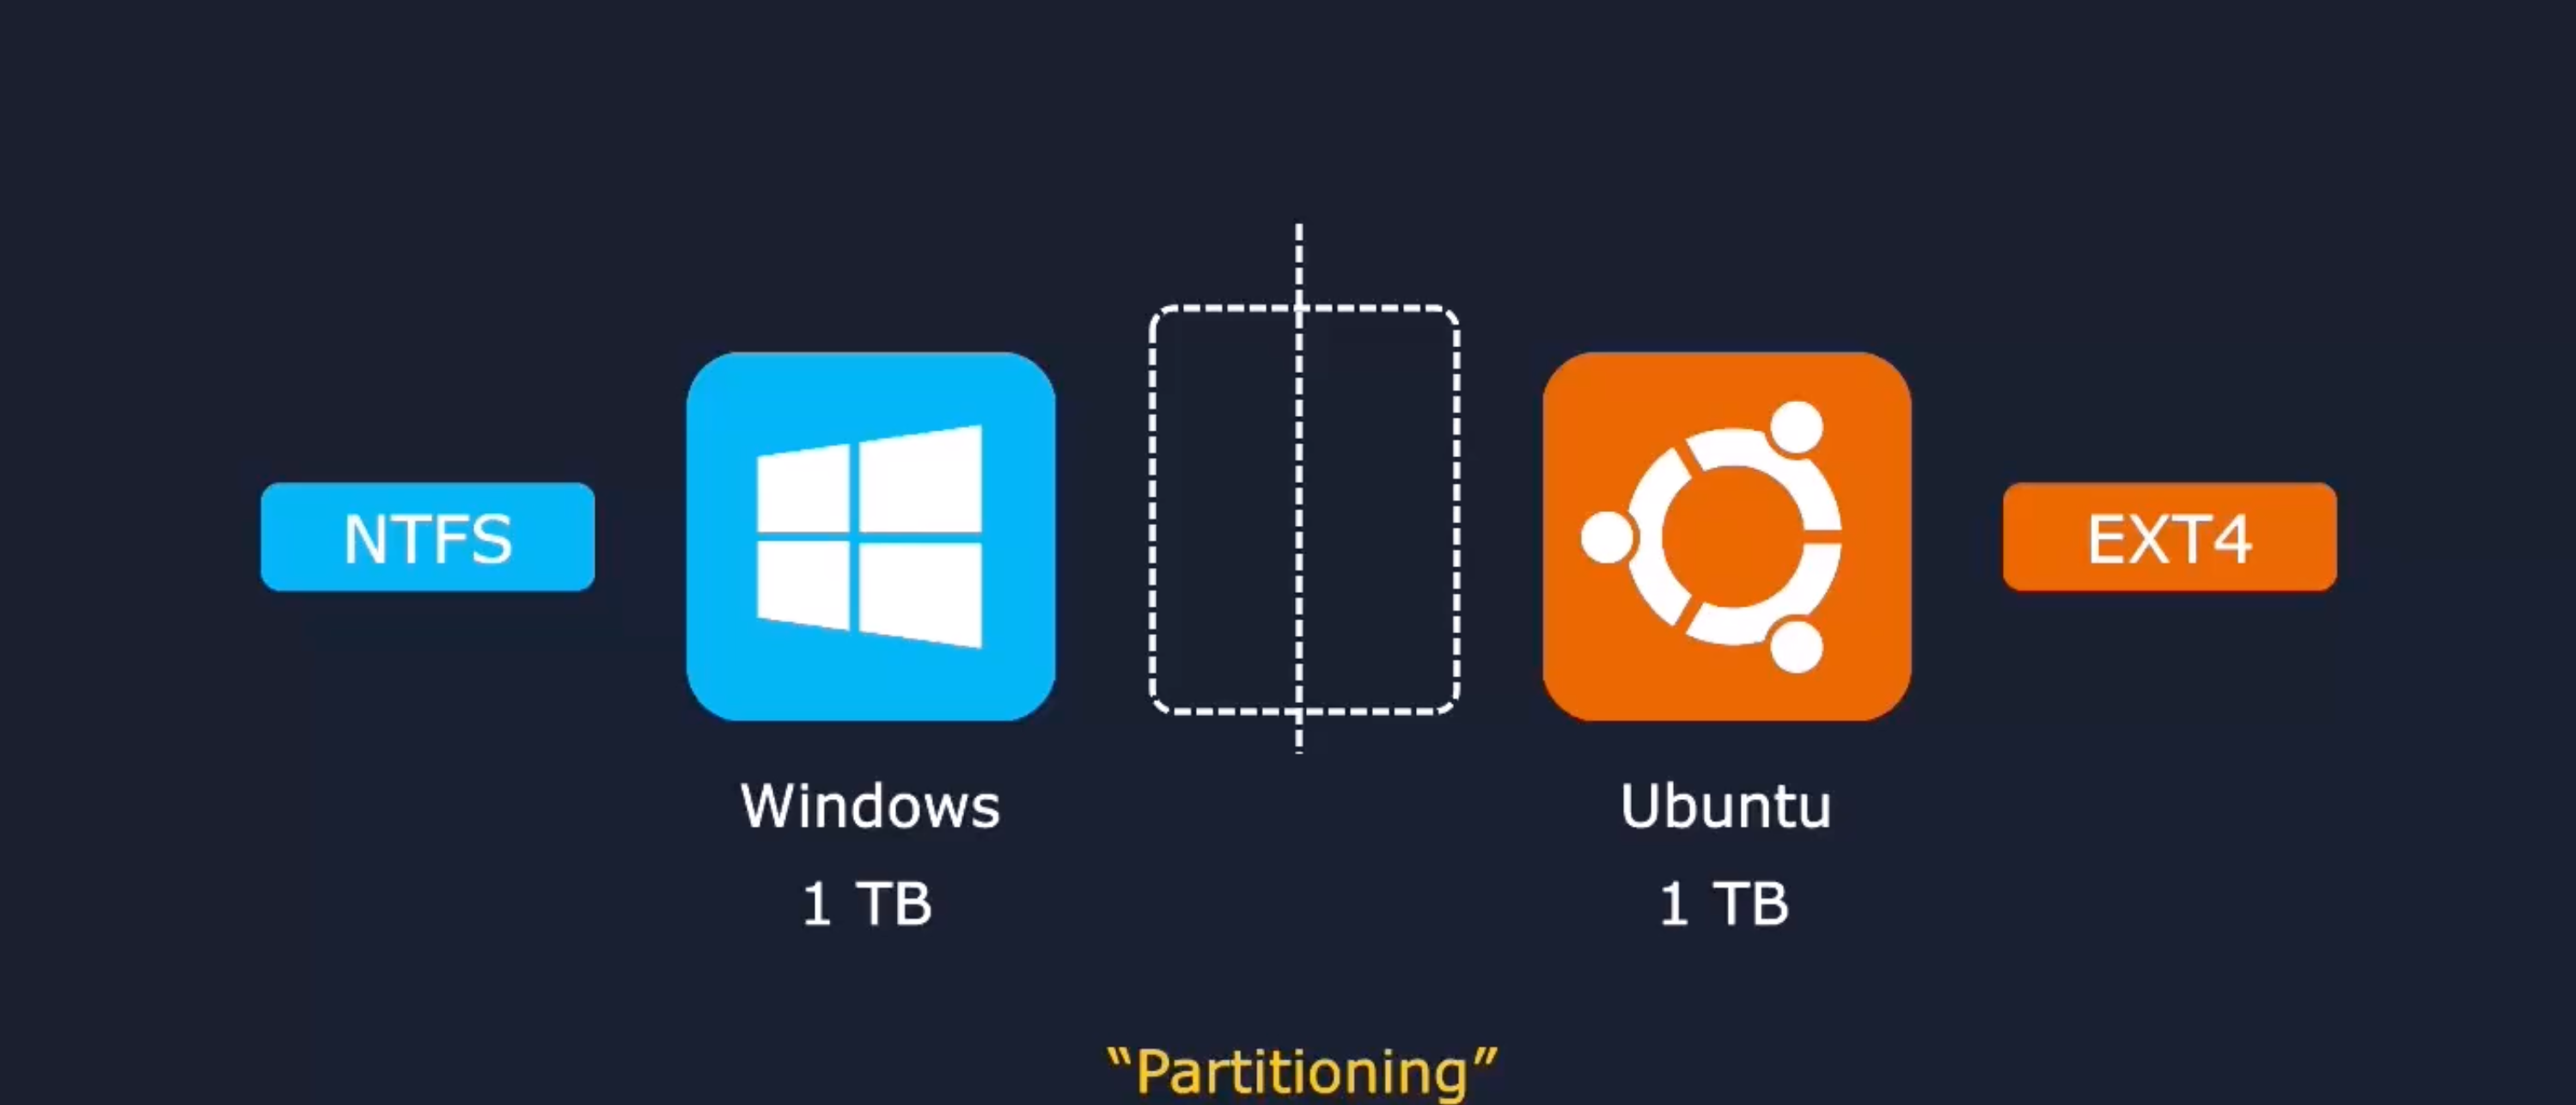
Let’s consider a scenario where you want to have both Ubuntu and Windows on the same disk.
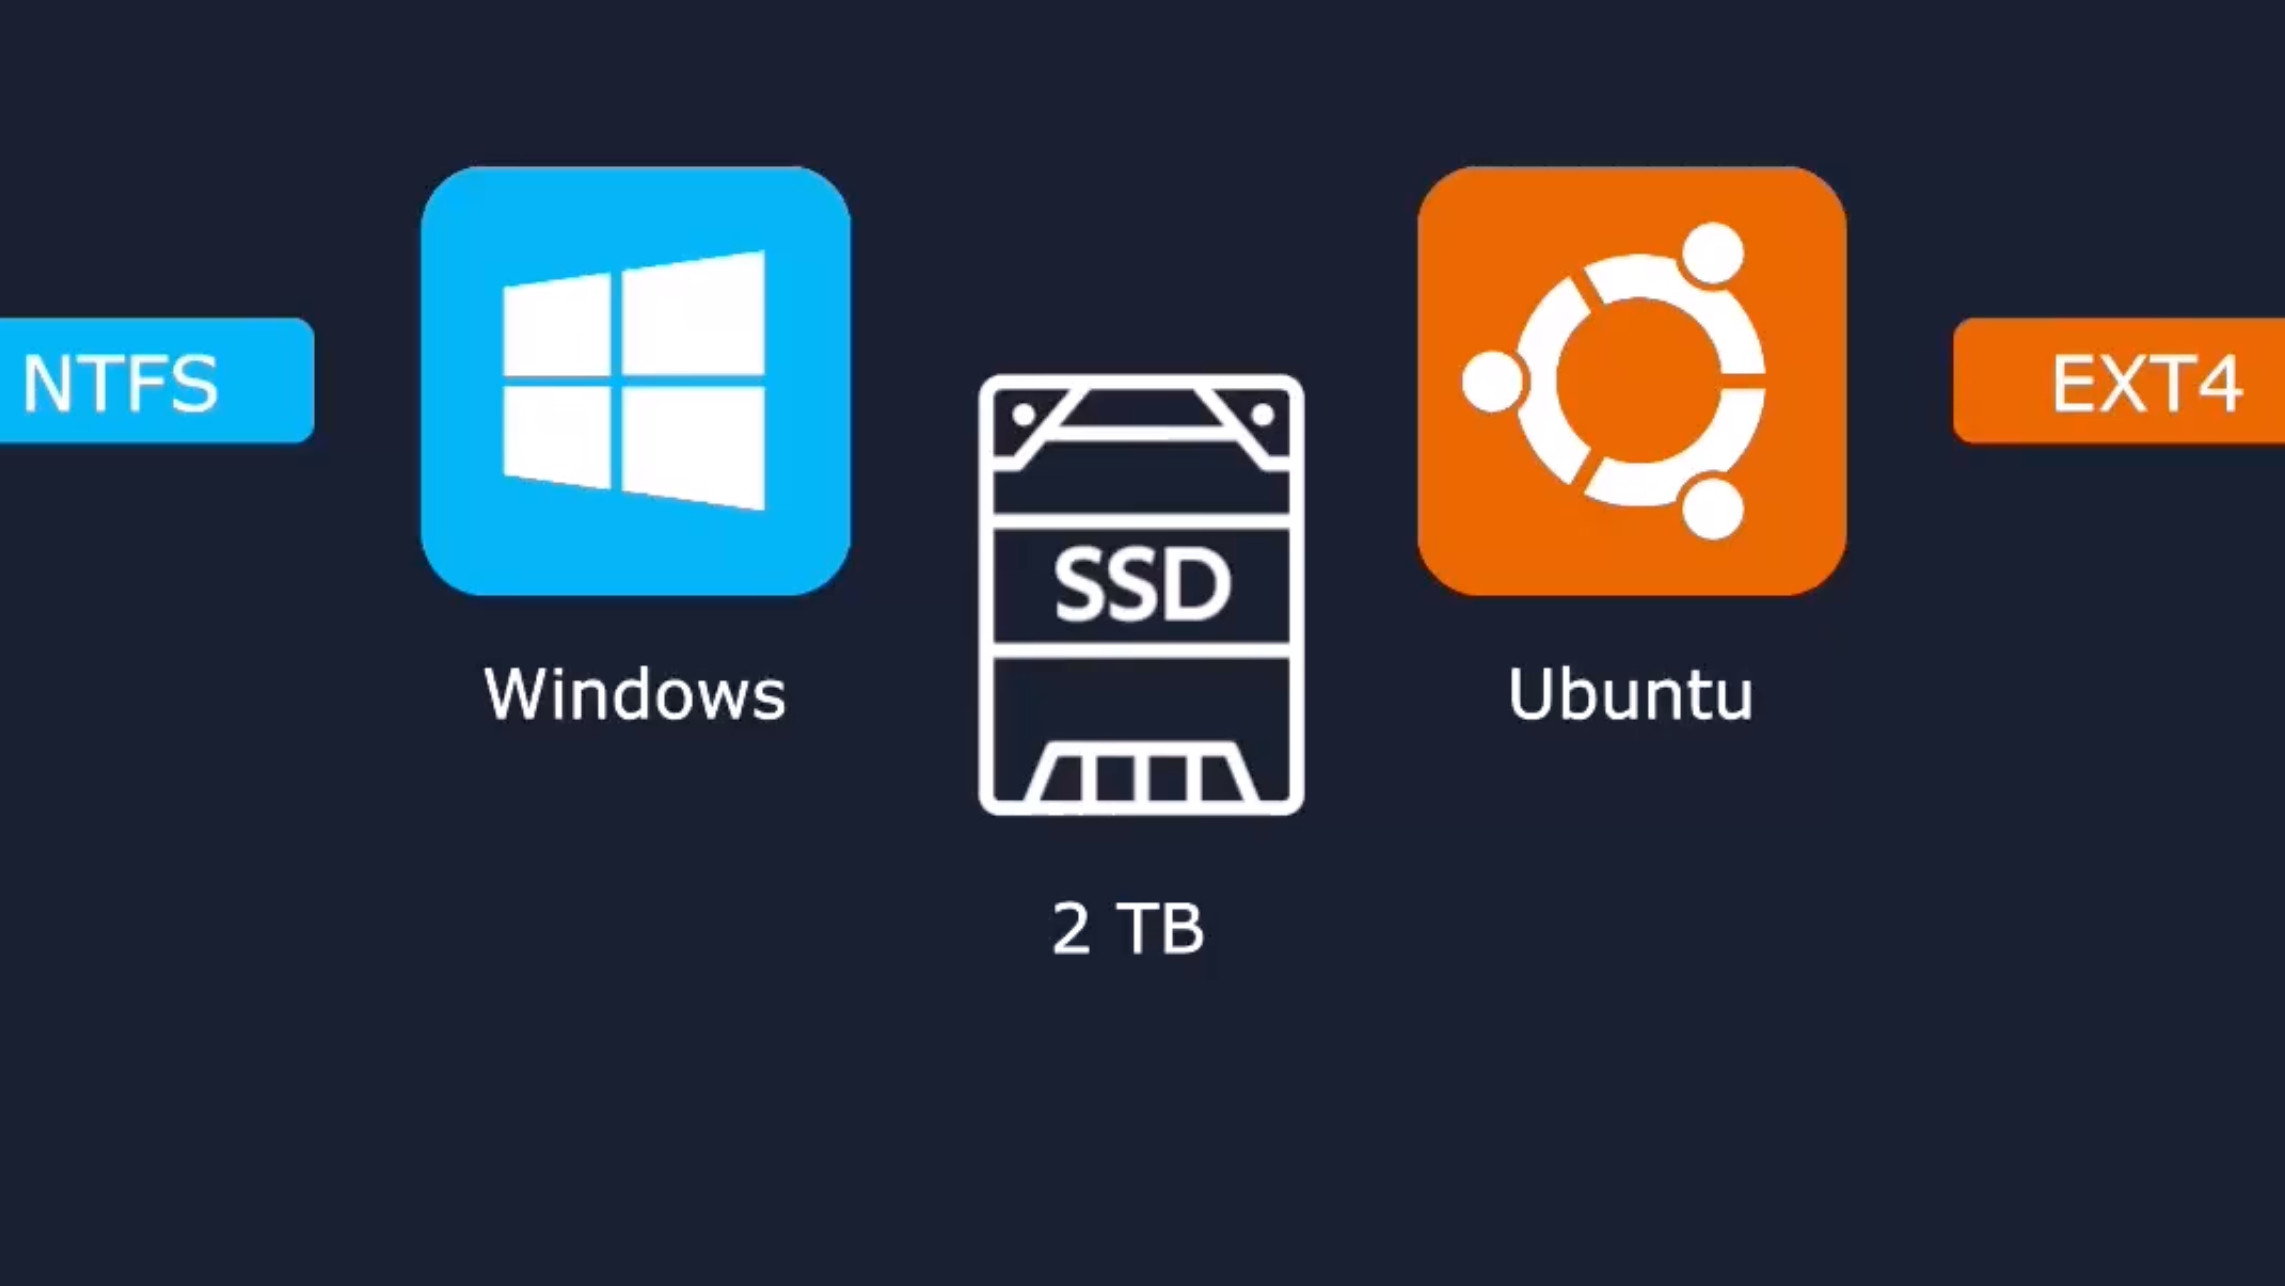
Windows uses NTFS as its filesystem, while Ubuntu typically uses ext4.
You cannot use both operating systems on the same disk simultaneously in a fully shared manner because the filesystems are different. A single disk cannot natively host two operating systems with different filesystems at the same time without some special configuration (like separate partitions or virtualization).
However, there is a simple solution to this issue. You can split the disk into two separate partitions, for example, a 1TB–1TB division on a single SSD, and install each operating system on its own partition.
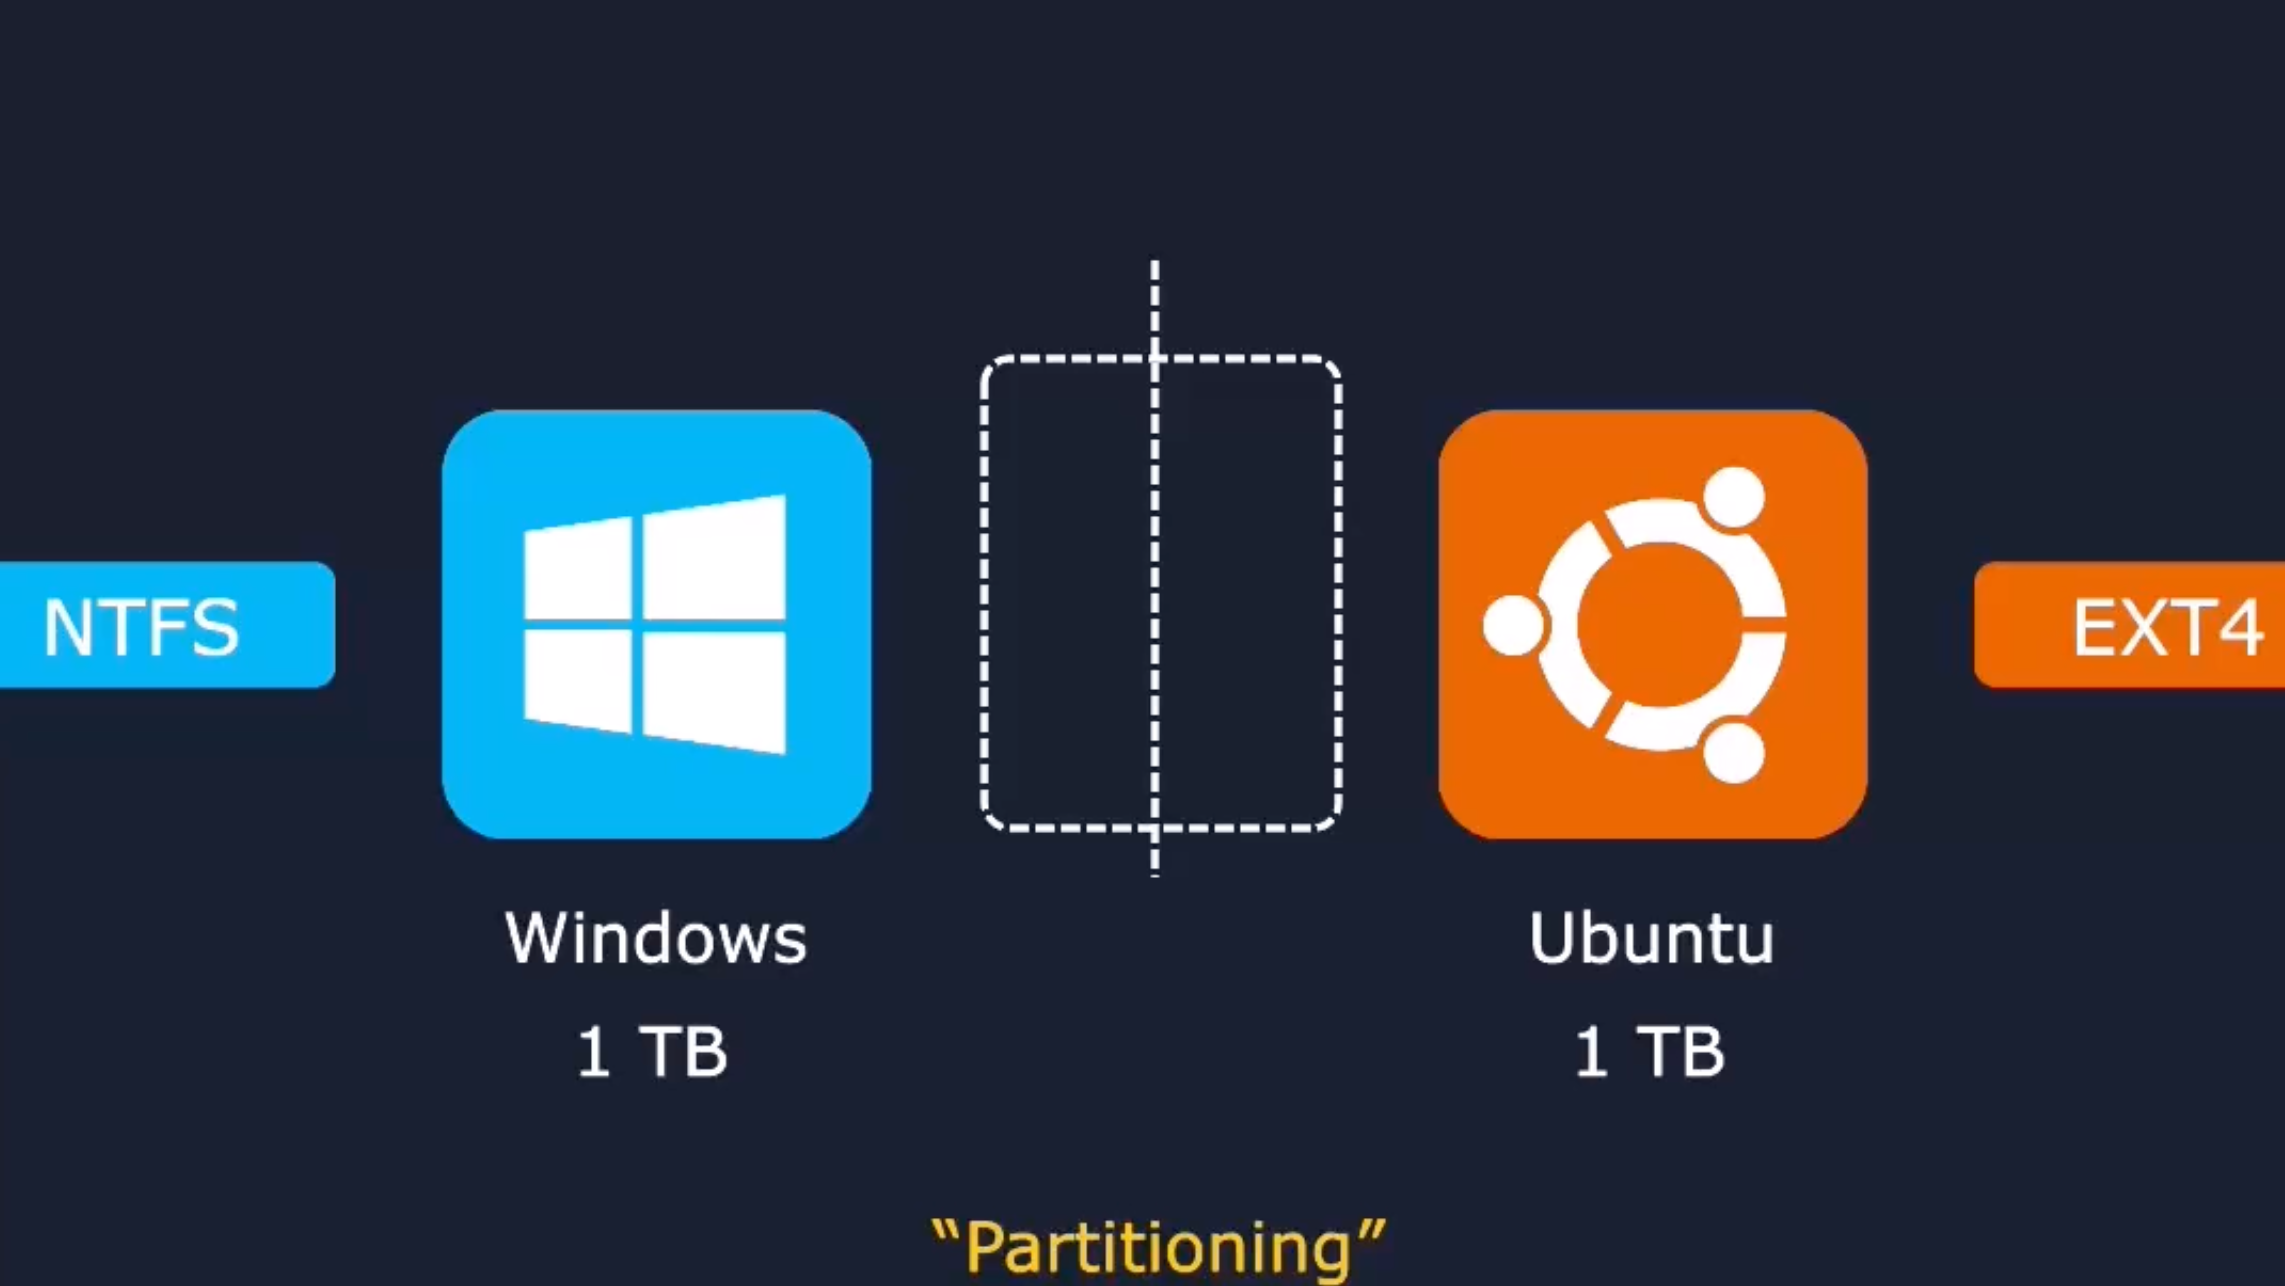
This method, known as partitioning , allows a disk to host different operating systems. It also ensures that data with different filesystems can be accessed safely on the same disk.
Which command do we use to view partitions on a Linux server?
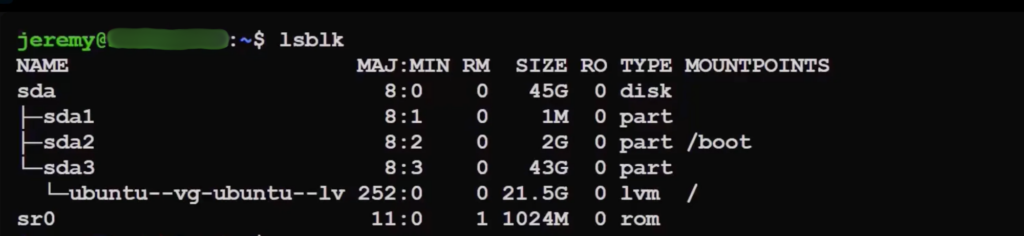
the blocks sda1, sda2, and sda3 are called block devices.
In this setup, the partitioning process has created three virtual block storage units. Here, sda represents the disk itself, while sda1, sda2, and sda3 represent the partitions, often referred to as “parts.”
In this case, sda is a virtual disk containing three partitions.
- The letter “s” comes from “serial”. If the SSD is connected via a SATA port (Serial ATA), devices on the motherboard start with “s.”
- If it were an NVMe storage device, the partitions would be labeled with NVMe names instead.
You may have heard that in Linux, everything is treated as a file. Therefore, the partitions and storage devices listed above are also represented as files.

Now, let’s create a second storage device and name it /dev/sdb.
To perform this operation, we will use the CFDISK command.
While old-school Linux admins often used the fdisk command, over the years cfdisk has become more popular as it allows for easier and more efficient disk partitioning.
sudo cfdisk /dev/sdb
Every piece of data on a disk consists of a series of 1s and 0s. Therefore, the operating system needs to know where each partition starts and ends. To help with this, we assign a label to each partition when creating it.
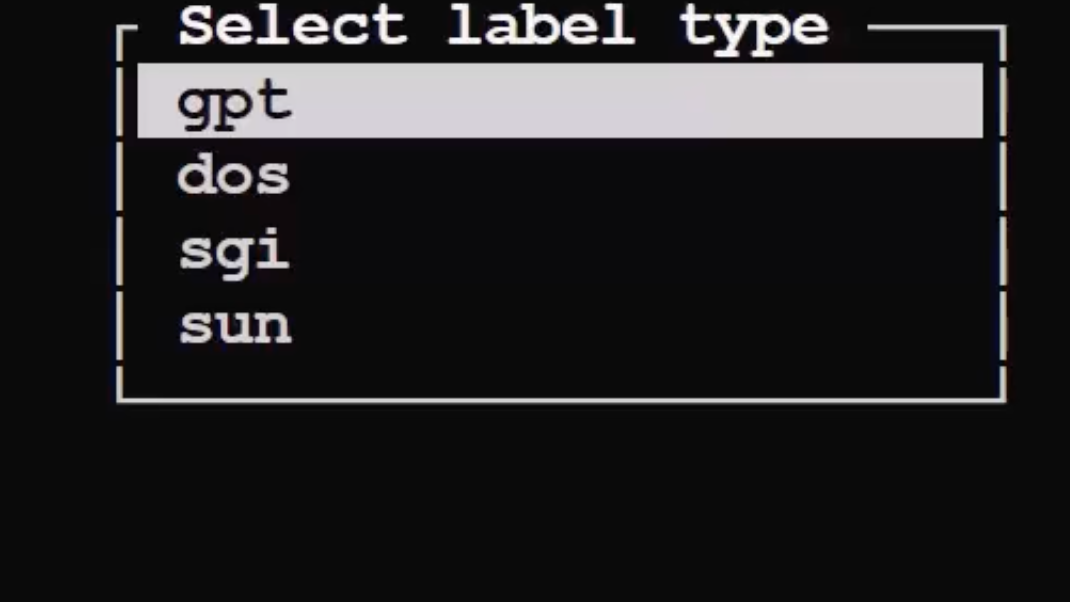
We select the GPT partition table. Another option is MBR (DOS), but this is used on older disks. Over the past 10 years, GPT has become the standard, so we continue with it.
Click the “New” button to proceed.
We can set the first partition size to 8 GB. For the remaining 2 GB of free space, click “New” again to create the second partition. The other 8 GB can be split evenly into two 4 GB partitions if desired.
The final layout will look like this:
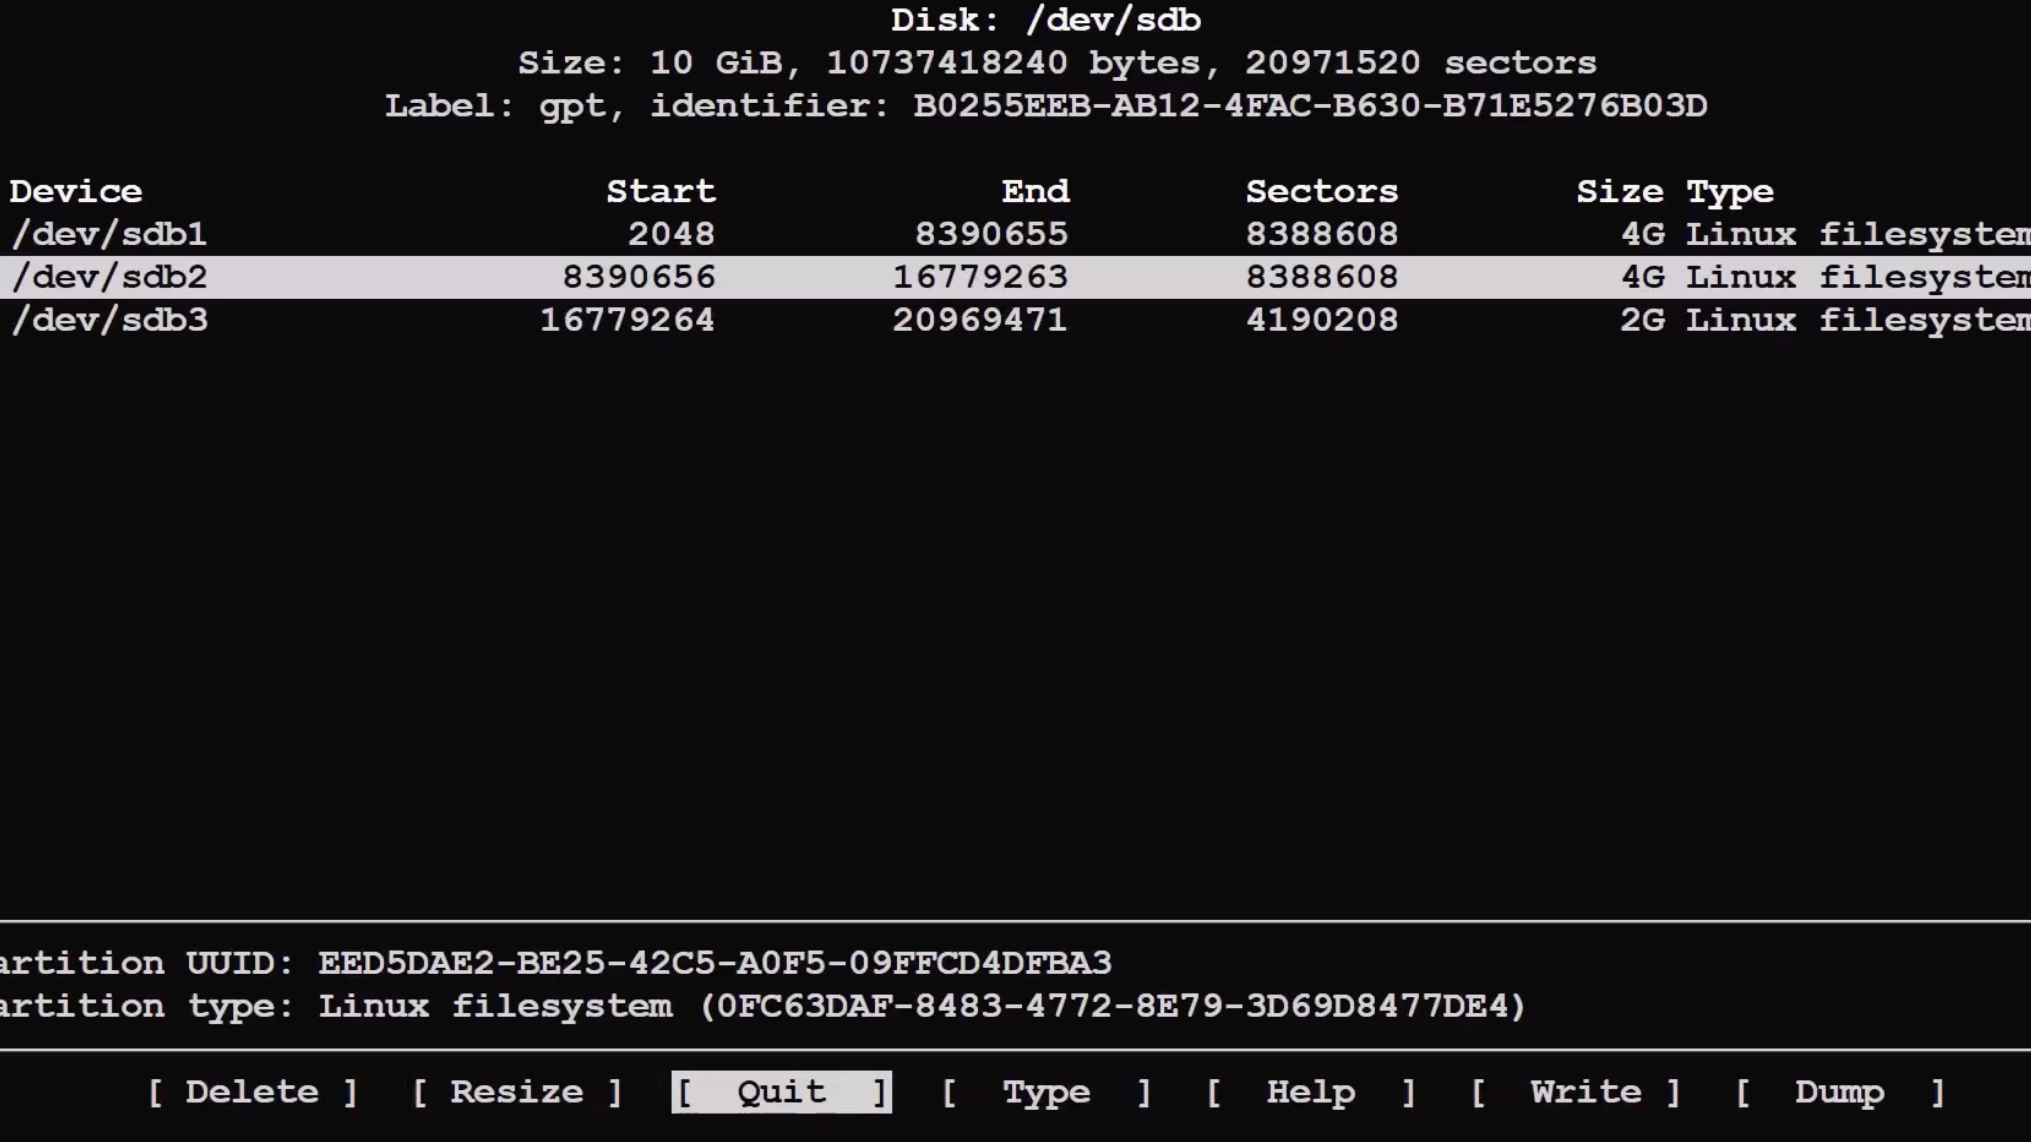
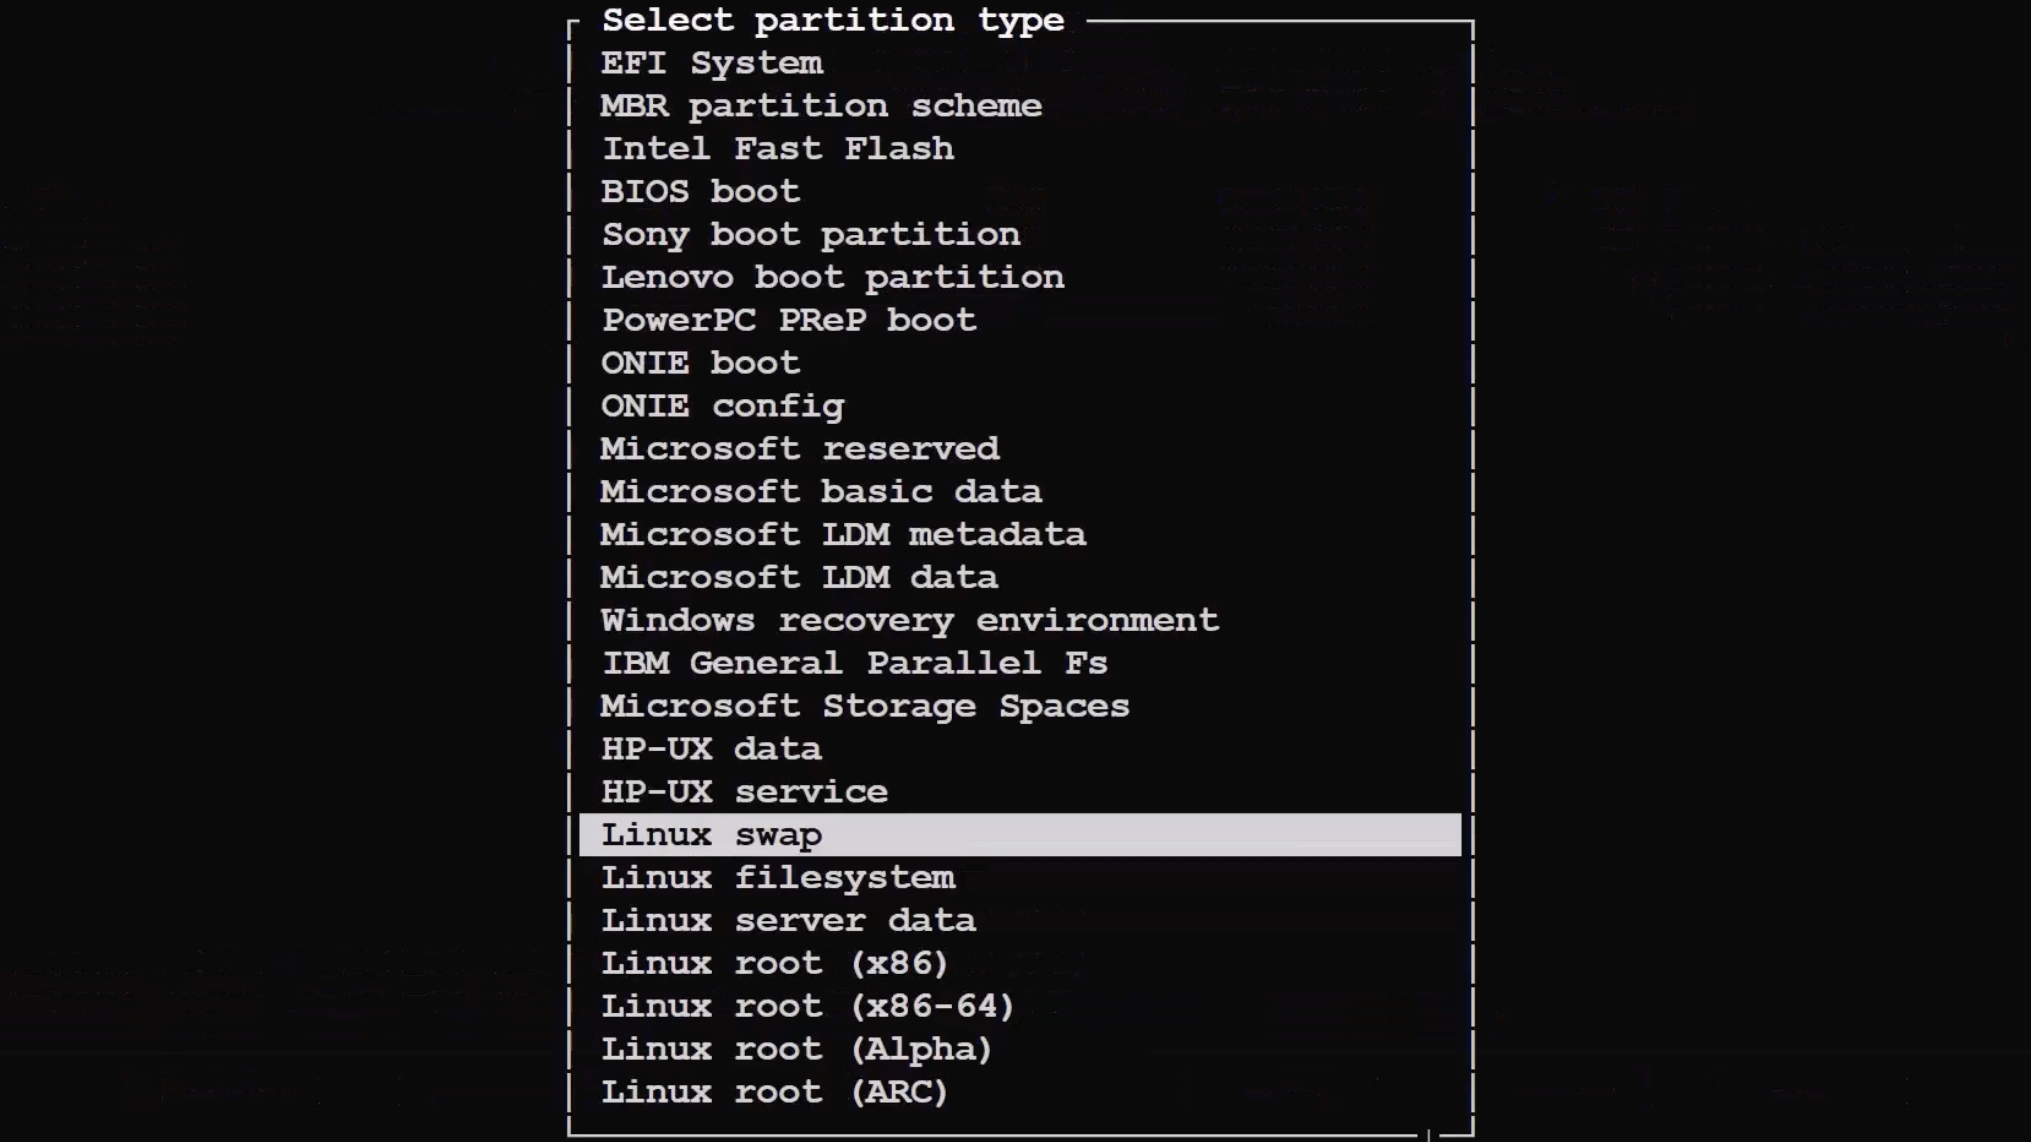
In the screenshot above, you will see the “Type” button at the bottom.
Using “Type”, you can select the filesystem type for each partition. For example, you can set the 2 GB sdb3 partition as swap. If the partition is meant to be a boot partition, select EFI.
As the final step, once you have verified that everything is correct, click the “Write” button to complete the partitioning process on the /dev/sdb storage device. This will create the partitions exactly as configured.
What is SWAP and Why Do We Need Swap Memory?
In Linux operating systems, when partitioning a physical disk, a 2–3 GB swap partition is usually created after separating the boot and system partitions.
Swap acts as an extension of your computer’s RAM. When the physical memory is insufficient, it temporarily stores data from programs consuming RAM, freeing up space in the main memory for continued operation.
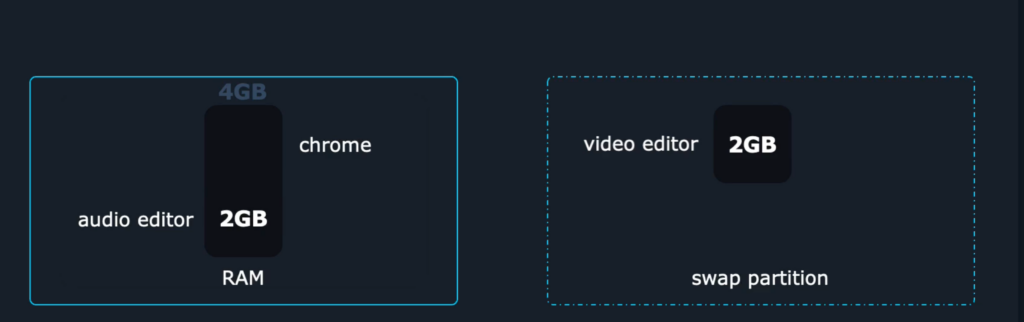
For example, if you are running a video editing program that uses 2 GB of RAM on a device with 4 GB of total RAM, and part of the memory is also occupied by your audio editor, your RAM may become full.
Despite this, you can still browse the internet using Chrome. This is because the 2 GB of memory used by the video editor is temporarily moved to the swap space, freeing up RAM for other tasks.
How can you check if swap is active
swapon —showIf there is no output after the command you got no swap areas.
For example, let’s try allocating the vdb3 partition as swap on Ubuntu, using the storage devices /dev/vda and /dev/vdb.
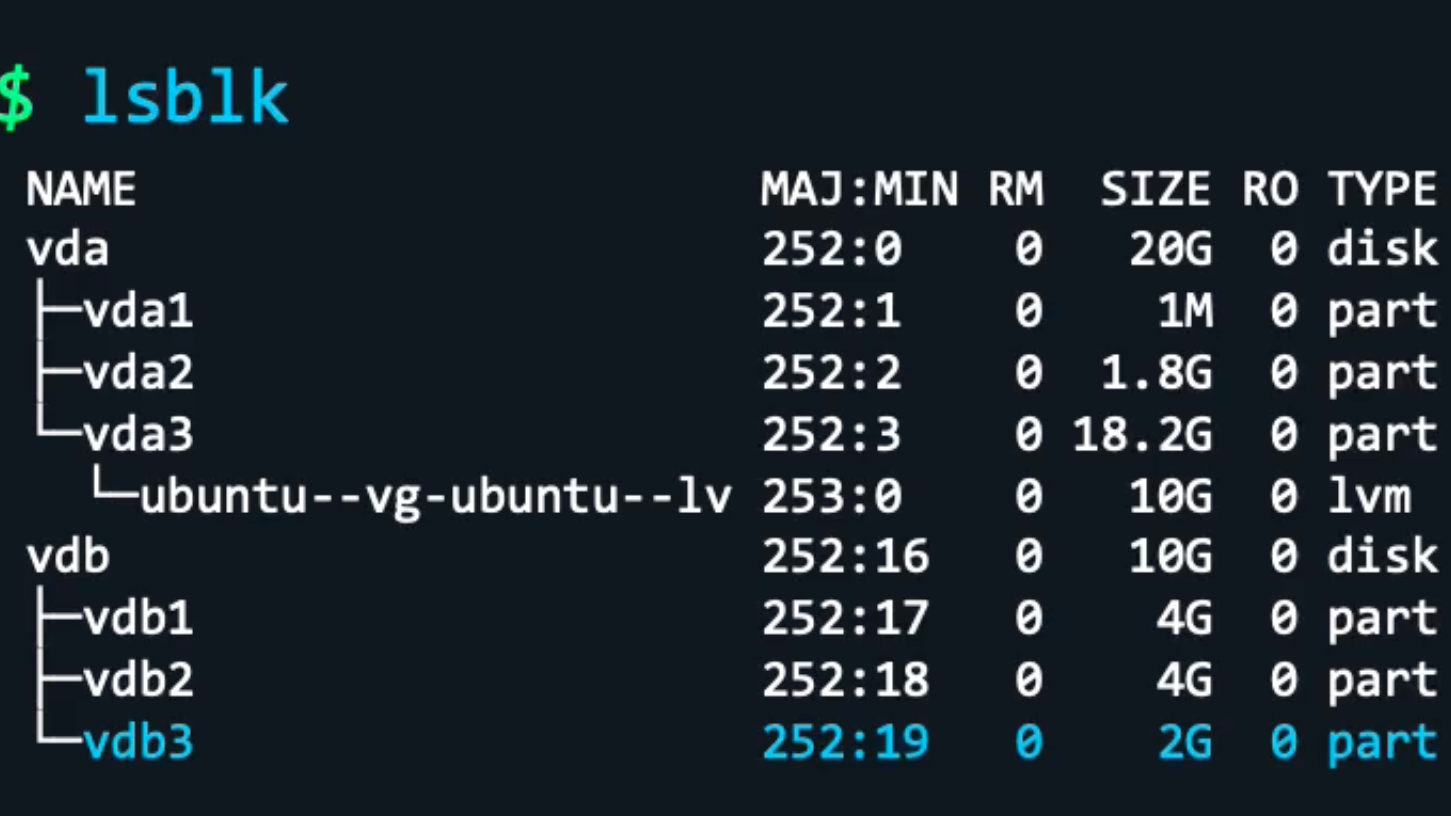
Let’s allocate the vdb3 partition as swap, since we had already prepared a 2 GB partition for swap using the cfdisk utility, as mentioned in the previous steps.
sudo mkswap /dev/vdb3
Setting up swapspace version 1, size = 2 GiB (2146410496 bytes)
no label, UUID=a39c80a1-a0c6-4ba2-a4a3-8a82058d8859
sudo swapon /dev/vdb3
swapon —show
If you do not want your partition as swap area, then :
sudo swapoff /dev/vdb3So far, everything is working normally. The vdb3 partition we allocated as swap is now active.
However, there is a problem: this setting is only temporary and will reset after a system reboot. To ensure that the swap memory we created remains permanent, we need to configure it to activate automatically every time the system starts.
How to set your swap area permanently
To make the filesystem permanently accessible on every boot, we first need to mount it.
Mounting simply means attaching the filesystem to an appropriate directory. Once mounted, the partition will become active during boot and will retain its assigned function even after a system restart.
sudo mount /dev/vdb3 /mnt/To test we create a file called:
sudo touch /mnt/testfileWhen the system restarts, there is a configuration file that automatically scans which filesystems should be mounted and where. Instead of running the mount command manually each time, we can define this in the configuration file. In a real scenario, the mount command is usually used only for testing, since it does not make changes permanent.
/etc/fstab
In Linux, the file that tells the system which filesystems to automatically mount at boot is:
The /etc/fstab file is a configuration file in Linux and Unix-based systems that defines how filesystems should be mounted automatically. Each line represents a filesystem and contains six fields. The last two fields (fifth and sixth) determine the order in which the system mounts and checks the filesystem during boot.
Now, let’s open this file using the vim editor and enter the appropriate values as shown in the screenshot.
sudo vim /etc/fstab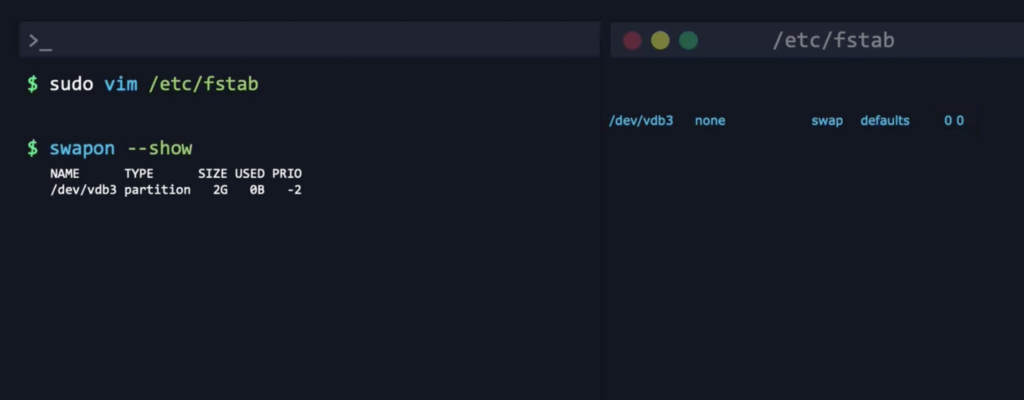
- /dev/vdb3: Specifies the device where the swap partition is located. Here, it points to the disk partition named vdb3. This means the swap space resides on the vdb3 device.
- none: Indicates the mount point of the filesystem. Swap partitions do not have a mount directory, so we use none.
- swap: Defines the filesystem type applied to the partition. Here, it indicates that this is a swap partition.
- defaults: Specifies the default mount options for the swap partition. Standard mount options for swap are used.
- 0: Determines whether the partition should be checked during fsck (file system check). 0 means it will not be checked.
- 0: Defines the order for mounting at boot. 0 indicates no boot priority for this partition.
/dev/vdb3 none swap defaults 0 0As another example, let’s register the 4 GB vdb1 partition we saw earlier with lsblk as an XFS filesystem in /etc/fstab for backup purposes.
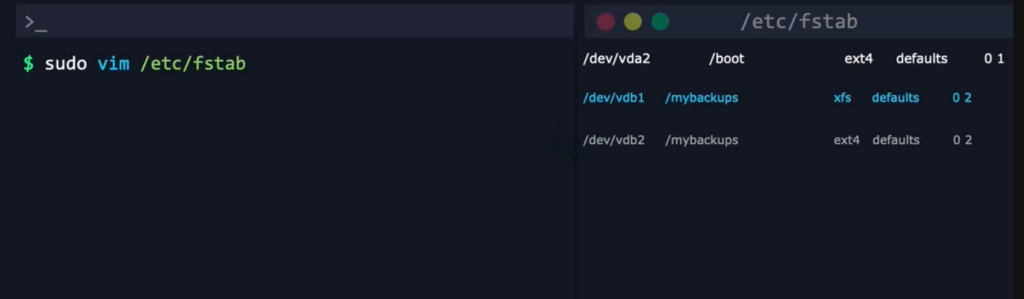
Here, we mount the /dev/vdb1 partition to the /mybackups directory in /etc/fstab and select the filesystem type as XFS. Since we assume this belongs to a secondary operating system, we use 0 2 for the last two fields.
We perform a similar setup for vdb2, assigning it the EXT4 filesystem. After exiting the editor, run the system reload command and then reboot.
Once the system restarts, you can verify the partitions created in /etc/fstab using the lsblk command. To check the mount list, you can use commands like findmnt or blkid.
sudo systemctl daemon-reload
reboot
lsblk -f
findmnt -t xfs,ext4
blkid
CREATING A FILESYSTEM
As mentioned earlier, after partitioning a disk, we need to create a filesystem on each partition to store files and directories.
For example, every operating system and Linux distribution uses its own filesystem type. Ubuntu typically uses ext4, while Red Hat prefers XFS, and this may vary with future updates.
To change or create a filesystem on a partition, we can use the following command:
man mkds.xfs
sudo mkfs.xfs /dev/sdb1OR
sudo mkfs.ext4 /dev/sdb1To create a filesystem on the sdb1 partition, we can use the mkfs command to format it as XFS or EXT4.
For a more advanced example, you can also specify the inode size and assign a label to the filesystem while creating it:
sudo mkfs.xfs -i size=512 -L “BackupVolume” /dev/sdb1- -i size=512: This parameter sets the inode size to 512 bytes. Inodes are structures in the filesystem that store metadata for each file, such as permissions, ownership, and timestamps. The default inode size is usually 256 bytes, but here we set it to 512 bytes.
- -L “BackupVolume”: This assigns a label to the filesystem. The label acts as a human-readable name for the filesystem, set here as “BackupVolume”, making it easier to identify and access.
Labeling the filesystem
sudo xfs_admin -L “FirstFS” /dev/sdb1In summary, the mkfs command can be used in the terminal to assign a filesystem type to partitions for testing or one-time purposes. However, like the mount command, these changes are temporary and will not persist after a system reboot.
To make filesystem and mount settings permanent, you need to define them in the /etc/fstab configuration file.